I was so thrilled on Friday to see that five people linked up to our Thank Goodness It's Finished, Friday party. I have to admit that I was a little afraid of being the only one hanging out with Grier so thank you to Debbie, Diana, Kelly (have you had the baby yet?), Cheree and Rhianon for linking up. Your work is beautiful and if other readers haven't had a chance to go check out
their link-ups yet, please do!
As I promised on Friday, here's the quilt-as-you-go tutorial for what I did with
Daniel Spies a Bottled Rainbow. This was the first time I'd done quilt-as-you-go (QAYG) and I'm hooked. What a fabulous way of quilting large quilts in manageable sections! There are a number of ways to do quilt-as-you-go (check out YouTube), but I think this is the simplest.
Connecting two quilted blocks:
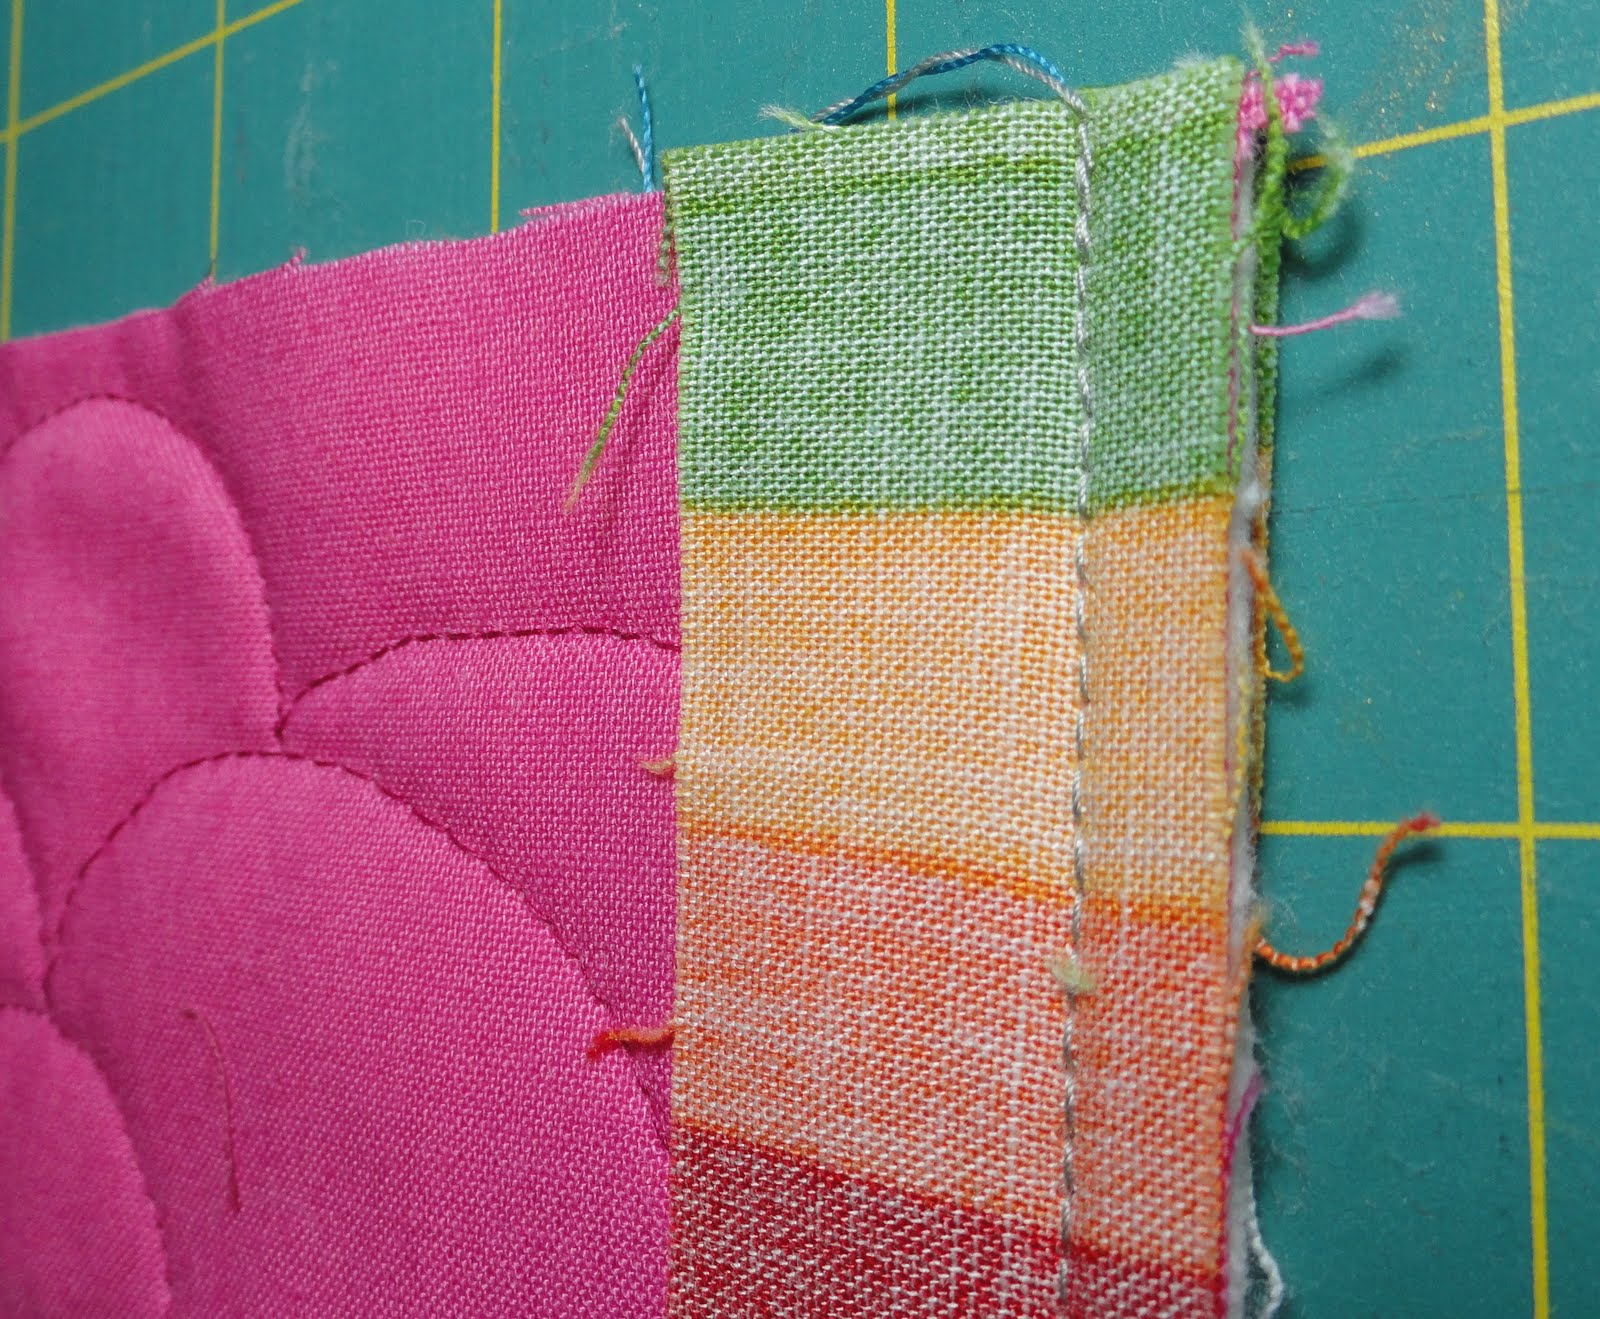
1. Cut 1" sashing. The length of sashing you will need will depend on the size of blocks.
2. Place one piece of sashing on the front of one block and one piece on the back with the right sides facing the block.
3. Line the sashing flush with the block edge.
4. Sew a scant 1/4" seam.

5. Check the back of the block and that the back sashing is also correctly sewn at a scant 1/4" seam.
6. Iron the sashing at the front of the block up.
7. Trim the sashing flush with the edge of the block. Tip: I started trimming these away from me (as you are supposed to for safety reasons), but I noticed that the sashing fabric was getting skewed. Once I started cutting towards me, the cuts were all straight.
8. Place your sashed block onto the block it needs to be sewn to, right side together. It is easier to maintain your 1/4" seam if you have the sashed block on the top.
9. Sew a scant 1/4" seam.
10. Place your attached blocks on the ironing board and set the seams.
11. Flip the top block over so that you see the front of the blocks. Iron.
12. Flip your blocks so that back is facing up. Your blocks should butt nicely together within the sashing. Iron.
13. Iron the back sashing over to cover the block joint.
14. Fold over the raw edge of the sashing to cover the sewing line and pin in place.
15. Blind hem stitch the sashing in place (I'm a lefty). NB: You can machine sew this down, but you will have a sewing line on the front of your quilt. If your sashing, block colour and thread colour are all the same, then this is a great, quick way to finish the seams.
16. Connect all the blocks in each row.
17. Connect the rows together using the same technique.
18. Voilà, you have a quilt-as-you-go quilt. Just add your binding and your label, and you are done!
I hope this is helpful. If you have any questions, don't hesitate to post them in the comments. If you have a question, chances are that other people do too.
Happy Monday!


No baby yet. Thursday looks like the day... unless she happens to decide to surprise us and come before. Thursday is definitely the latest. Thanks again for hosting TGIFF! I look forward to linking up again when I get back into the swing of things, and have finished projects. :) Thanks also for the quilt as you go tutorial. I might try this in the future!!
ReplyDeletethanks for this. I have done one QAYG and did it a little different. This way seems much more user friendly, especially for this old brain of mine!
ReplyDeletevery well understood. THANK YOU! There are many beautiful color TISSUES TE collected.
ReplyDeleteThanks for your tutorial, I have been doing it slightly differently and it's nice that there's yet another method (which I'll try)!
ReplyDeleteThanks for sharing this QAYG! I have done this before and your post just reminded me how much fun it is to do. Will have to do it again soon!
ReplyDeleteGreat tutorial and I love the quilt!
ReplyDeleteTHANK YOU!!!!!
ReplyDelete!!!!!!
: )
Thanks for the tutorial (just came across it)! Nice and clear. I did have a question: when you fold over to the back and then fold raw edge of the sashing to cover the sewing line ... is this strong enough to keep it all together if the quilt is to be washed a lot?? Thanks Marta (martaamasotti@gmail.com)
ReplyDelete